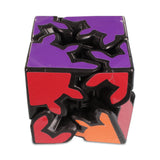
How to Solve a Gear 2x2 (Gearshift)
If you're here, reading this, you probably want to know how to solve the 2x2 gear cube (Gearshift)? It may look tedious and hard but don't worry, its really not. Now, the first thing you should know about the gear 2x2 cube is that the corners never leave there original location, they simply rotate around themselves giving the illusion that they have moved.
Now, although this puzzle looks like a Rubik's 2x2 (just with gears) it has a slightly different notation. First of all (I'm sure you are all aware by now) is that each layer can pull apart from the rest and rotate individually. Try it now.
Hold your 2x2 gear cube with any face towards you, gently pull the left and right layers apart. You'll notice you can now twist the corners on each layer individually. Luckily, we do not need any really notation for this 2x2 gear cube solution. All we must understand is that when we say "Pull out the RIGHT layer" and "Pull out the FRONT layer" you are pulling out the correct layers. This is incredibly simple and does not need much teaching, the right layer is obviously on the right, the top layer is on the top and the front layer is the layer facing you etc...
So, in this step we will be solving the 1st layer of the 2x2 gear cube. Its super easy and shouldn't take more than a few minutes. Just follow each bullet point and you'll have yours solved in no time at all. We will start by solving the whole green face. I suggest you do the same to make this guide as easy to follow as possible.
- Look around your gear cube until you see any green sticker/corner piece.

- Locate the 3 other green corner pieces (they will always be next to that first white corner we found as the pieces only rotate around themselves and never actually change position).

- In the image above all of the corners which contain green pieces are on the corners in the top layer. Make sure your puzzle is the same and place it down on a table.
- Pull the right side out and twist the corners until both greens are on the facing up on the top layer, just like the image below.

- Turn your puzzle around so that the newly solved green pair are on the left hand side of the top layer.

- We now want to twist the right hand side until we create another pair of greens on the top layer.

- Once all of the green side of your 2x2 gear cube has been solved you can push the right side back in (your puzzle should look like the image below).

- Turn your gear 2x2 over so that the green side is now on the bottom.

- Turn your puzzle around until the 2 yellow corners are facing you and pull the top layer up (you can use any other colour if you want but to make it simple just follow us).

- Spin the top layers corners until you create a complete yellow face (like the image below).

- Push your top layer back down and you will notice that your 2x2 gear cube is nearly solved. You will have 1 of 4 cases.
- These 4 cases are as follows: Solved, 1 big corner out of rotation, 1 small corner out of rotation, 1 big and 1 small corner out of rotation.
- Here are a few images of the different cases. Move on to step 3 once you decide which case you have fallen under.
- 1 Small Corner:

- 1 Big Corner:

- Both Big and Small Corners:

Okay, so the 3 cases above will each require a slightly different approach to solving. Lets carry on!
Solving 1 Small Corner
- To solve one small corner is very simple. We first want to establish how many teeth it needs to move and which way. Take a look at the image below and see if you can figure it out. A clue - Look at the red teeth on the purple layer, how many teeth do they have to move and in which direction to be in the correct place?

- SPOILER: 2 teeth, anti-clockwise. How did we come to that conclusion do you ask? Well... Let me explain.
- Next hold the small corner which needs to be solved in the bottom right of the front face.

- Pull the front face out.

- Now comes the tricky bit (kinda). We want to spin that tiny cog in the direction we want it to move (anti-clockwise, remember?) until the big cog above it has rotated twice (because our small cog is 2 teeth out we want the big cog to rotate twice. If our small cog was 4 teeth out we would spin the big cog 4 times).
- Push your front face back in once that is done. Hopefully you had no issues? If you did, please watch the video at the end of this step. Now we want to make sure that tiny unsolved corner is still in the bottom right hand corner of the front face and pull the right side out.

- Perform the exact same move, spin that tiny corner in the bottom right in the direction we decided earlier (clockwise or anti-clockwise (anti-clockwise in our example)) until that big purple/green cog above it has spun around twice (720 degrees).
- Push the right hand side of your 2x2 gear cube back in.

- Last bit, pull the top layer up and spin any corner until your puzzle is solved. Easy, Right? If you struggled with any of that the please do watch the video at the end of this step.
So, solving 1 big corner is much the same as solving a tiny corner but with 1 big difference. Once we have decided how many teeth we need to move and in which direction, we want to half the number. Big cogs can only be out by 2 or 4 teeth (if yours is out 1 or 3 teeth then something has gone wrong and you should muddle your puzzle up again).
I am going to run over this quickly, if you are struggling please read the above step 3A on solving 1 small corner but on step 1 where we had 2 teeth, you would divide that number by 2 (meaning you spin that big corner either clockwise or anti-clockwise so that the tiny cog above it rotates just once).
- First we want to establish which way this big corner needs to move in order to be solved.

- In my example above we want the orange/red/blue corner to be rotated anti-clockwise 2 teeth. Obviously we want it to rotate anti-clockwise so that the orange/red/blue all matches, but WHY 2 TEETH? The reason its 2 teeth is because that big orange tooth on the top layer wants to be 2 positions anti-clockwise of where it is now, if that doesn't make sense just watch the video at the end of this step.
- Hold the big corner in the bottom right hand corner of the front face.

- Now, Pull the front face out.

- There are 2 questions to ask ourselves. Which way do we want it to rotate? Anti-Clockwise. And by how many teeth? 2. Unlike solving the tiny cog above we want to divide that 2 teeth by 2, so 1 (If you have to move 4 teeth you would divide it by 2, equalling 2).
- Rotate that big cog in the direction you want it to go (anti-clockwise in our case) until that tiny cog above it has done 1 complete spin (or 2 spins if you had to move 4 teeth originally). Push your front face back in.

- Pull out the right hand face, keeping that big corner in the bottom right hand corner of the front face.

- Perform the exact same move as above. Spin that big cog in the bottom right hand corner of the front face in an anti-clockwise rotation (in our example but yours may be different) until that tiny cog above it has done 1 complete 360 degree rotation and that red sticker is back facing you again. Push the right side back in.

- You can now pull the top layer up and rotate the corner pieces until your gear cube is complete.
If your 2x2 gear cube has 1 small cog and 1 big cog out of rotation after completing step 2, you are very unlucky. You will have to perform both steps 3A and 3B and solve each corner 1 by 1.
If you have solved your 2x2 gear cube using this very thorough tutorial then please do fill out the polls at the end of each section and let us know how you got on. We are always updating our blogs and solution guides based on your responses, we make them better once you tell us how.


